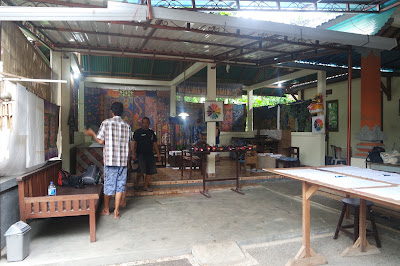
Batik is one of Indonesia's heritage that are famous world-wide already and no doubt the fabric charms bring along many tourists to come to Indonesia just want to learn how to make their own batik. My host mom from France is one of them. She still remembered that she said when we were in USA that If she ever come to Indonesia, she would like to make batik together with me. So here we are, on our first trip together in Bali-Indonesia, our dreams come true. Together with other friends, one friday morning we were picked up by Widya Batik Workshop. This workshop is a family business so the workshop itself will be in the back of family compound. The place are simple and semi-outdoor accompanied by the sound of chicken or duck coming from the backyard.
 |
| Widya Batik Workshop in Ubud - Bali |
When we arrived, they already prepared the stuff for batik painting. One of the man are ready to explain how to make a batik :
1. Choose your own design
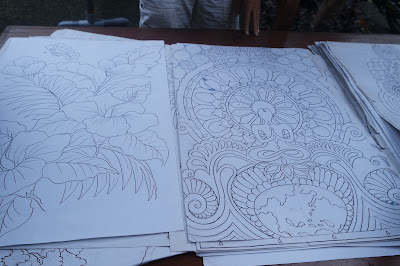
Before we went to this place, me and our host family did a little bit research about what kind of picture / pattern that we are going to draw. I'm a little bit worried because I'm not good at art or drawing but luckily here, they provided many pictures drawn on A5 sheet paper and we just need to trace it down. After choosing among so many beautiful design, I chose Koi fish.
2. Trace it down
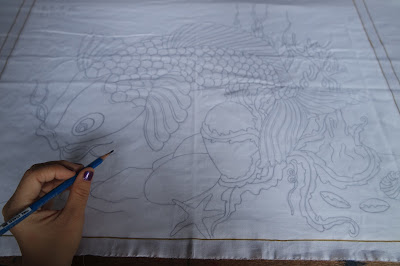
After choosing the paper, put the paper below the thin cotton fabric that already prepared in the long table. Start tracing down lightly so if you have mistakes, it will removed easily.
3. Learn how to draw with canting
Canting is a special tool to draw the design with the wax. After we are finished tracing it down, the staff will hand a small cotton with our design as sample and to be used to learn how to draw batik with canting. First, take wax with canting, just a little bit (less than half of the canting's capacity) and start drawing the line based on what we already trace. Replace the wax in 10 seconds or less and repeat again. We must start always from left top and use canting in 45 degrees so the wax will not spill in the picture or if it's too high it will drop on your hand (caution : it was HOT! i dropped some in my hand). It's really took focus, patience to do the whole thing for hours. Sometimes if I get bored, I became not careful and the line will looks terribly. I also drop wax in the cotton and trying to simplify my drawing so I can finish faster. In the end, the staff on the workshop also helped me to do the back of the fabric because it have to be bold enough and appears on both sides.

4. Starts coloring
Still with the sample cotton, the staff explained the technique of coloring. Some color will only changed if we put it under the sun or after washing process. Even though it looks easy, it takes quite times after i get used to with small/big brush and start coloring my batik.
5. Let's try on real thing
After lunch, we continued the batik process and now the staff let me use my real cotton fabric and start to do the canting and coloring process. I'm anxious I will ruined everything but the staff always encouraged me everything will be okay. Even the mistakes can be fixed later on. The staff also so helpful and never seems disturb whenever I ask questions or advice on what color should I put. The owner also gives hand and put a shading colour on my picture and draws some more of batik pattern for the background. I feel a little bit more confident now that my batik are with such a great professional people.
6. Make a batik stamp
For the side of batik, choose batik stamp. It's easier because we only need to heat the copper stamp with wax and stamp on the cotton. I chose the one that looks like barong pattern.
7. Dry on the sun
After finish, put outside in the sun to seal the colour.
8. Washing
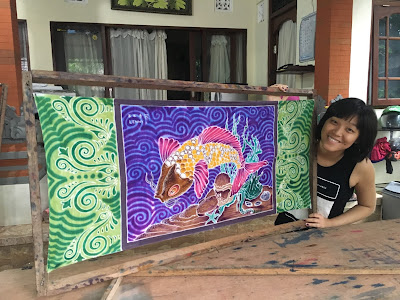
Even after you already put on the sun, you basically can still draw something, add something or put more color before washing. But once its already washed, you can't changed your batik anymore. And here's my final version of batik with the owner's help. I'm so happy and satisfied with the result!
 |
| My Batik |
Tips :
1. Booking is a must. Sometimes they wont accept walk-in-customer because basically they need to prepare the stuff and equipment the day before.
2. Wear casual clothes that you're not afraid when it gets dirty and also wear comfortable shoes / flip flops because mostly the activity will be done by standing.
3. The best time to do batik workshop is summer season because there are plenty of sun so the drying process is quick. In our case, the staff need to dry it using hair dryer because it's raining all day.
Facility :
1. Starts from 10.00 AM - Afternoon ( 4-5 PM)
2. Free pick up in ubud area
3. 1 free mineral water
4. Lunch available (The price starts from Rp.20.000 and i do love the cap cay menu)
5. Clean sit toilet
6. In one day, there are 3 staffs handling about 10 people in one day. They are so kind and put a lot of attention for us.
Widya BatikAddress : Jl.Sriwedari No.61.Br.Tegallantang Ubud,Gianyar, Ubud, Bali 80571Price : Rp. 450.000


0 komentar:
Posting Komentar